 |
CMSIS-RTOS2
Version 2.1.0
Real-Time Operating System: API and RTX Reference Implementation
|
 |
CMSIS-RTOS2
Version 2.1.0
Real-Time Operating System: API and RTX Reference Implementation
|
The steps to create a microcontroller application using RTX5 are:
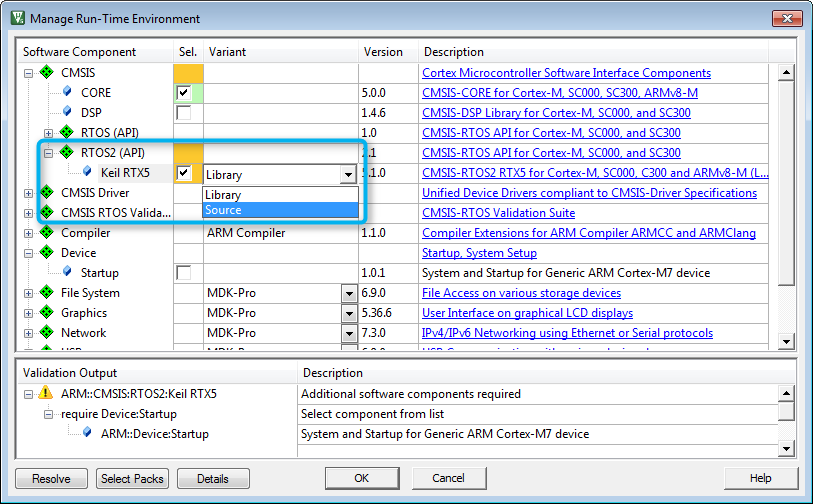
In the Manage Run-Time Environment window, select CMSIS::CORE and CMSIS::RTOS2 (API)::Keil RTX5. You can choose to either add RTX as a library (Variant: Library) or to add the full source code (Variant: Source - required if using the Event Recorder):

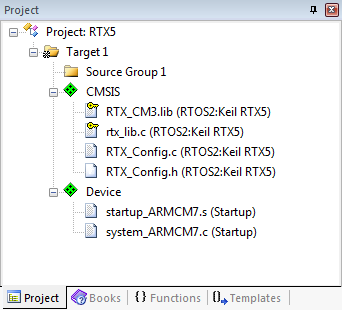
Click OK. In the Project window, you will see the files that have been automatically added to you project, such as RTX_Config.h, RTX_Config.c, the library or the source code files, as well as the system and startup files:

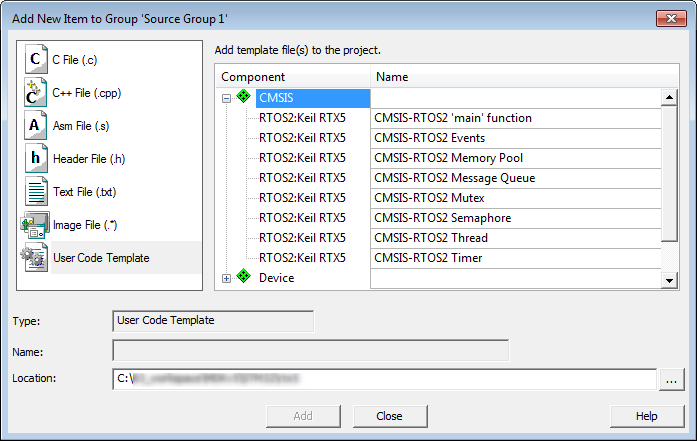
You can add template files to the project by right-clicking on Source Group 1 and selecting Add New Item to 'Source Group 1'. In the new window, click on User Code Template. On the right-hand side you will see all available template files for CMSIS-RTOS RTX:

If you require some of the RTX specific functions in your application code, #include the header file rtx_os.h. This enables low-power and tick-less operation modes.

main()).Once the target application generates event information, it can be viewed in the µVision debugger using the Event Recorder.